The RankReady setup wizard, step by step
Work through every RankReady setting in order, from Brand Identity to AI Content, so nothing is left half configured.
Last updated October 15, 2026
This page walks the whole configuration in the order that makes sense, from the first screen to the last. Follow it top to bottom and every RankReady feature ends up either on and configured, or off on purpose.
If you skipped any onboarding screen when you activated the plugin, or you never saw one, nothing is lost. Every setting below lives permanently in the admin and can be changed at any time. The plugin does not hold features back until an onboarding step is completed.
The setup wizard
The first time you open RankReady after activating, a three-step setup wizard opens. It lets you switch features on or off in one place. The final screen links to Connect an AI provider and Go to Dashboard. It also links to your /llms.txt, but only if llms.txt is switched on. llms.txt is off by default, so the link is replaced by a prompt to enable it. You can re-run the wizard later from the RankReady admin with Re-run the setup wizard.
Where the settings live
Open the RankReady menu item in wp-admin. There are five tabs:
- Dashboard,
tab=dashboard - AI Visibility,
tab=crawlers - AI Content,
tab=content - Insights,
tab=insights - Settings,
tab=settings
Most of the setup happens under AI Visibility. Note the URL slug for that tab is crawlers, not visibility, which is useful to know if you are bookmarking screens.
Step 1: Brand Identity
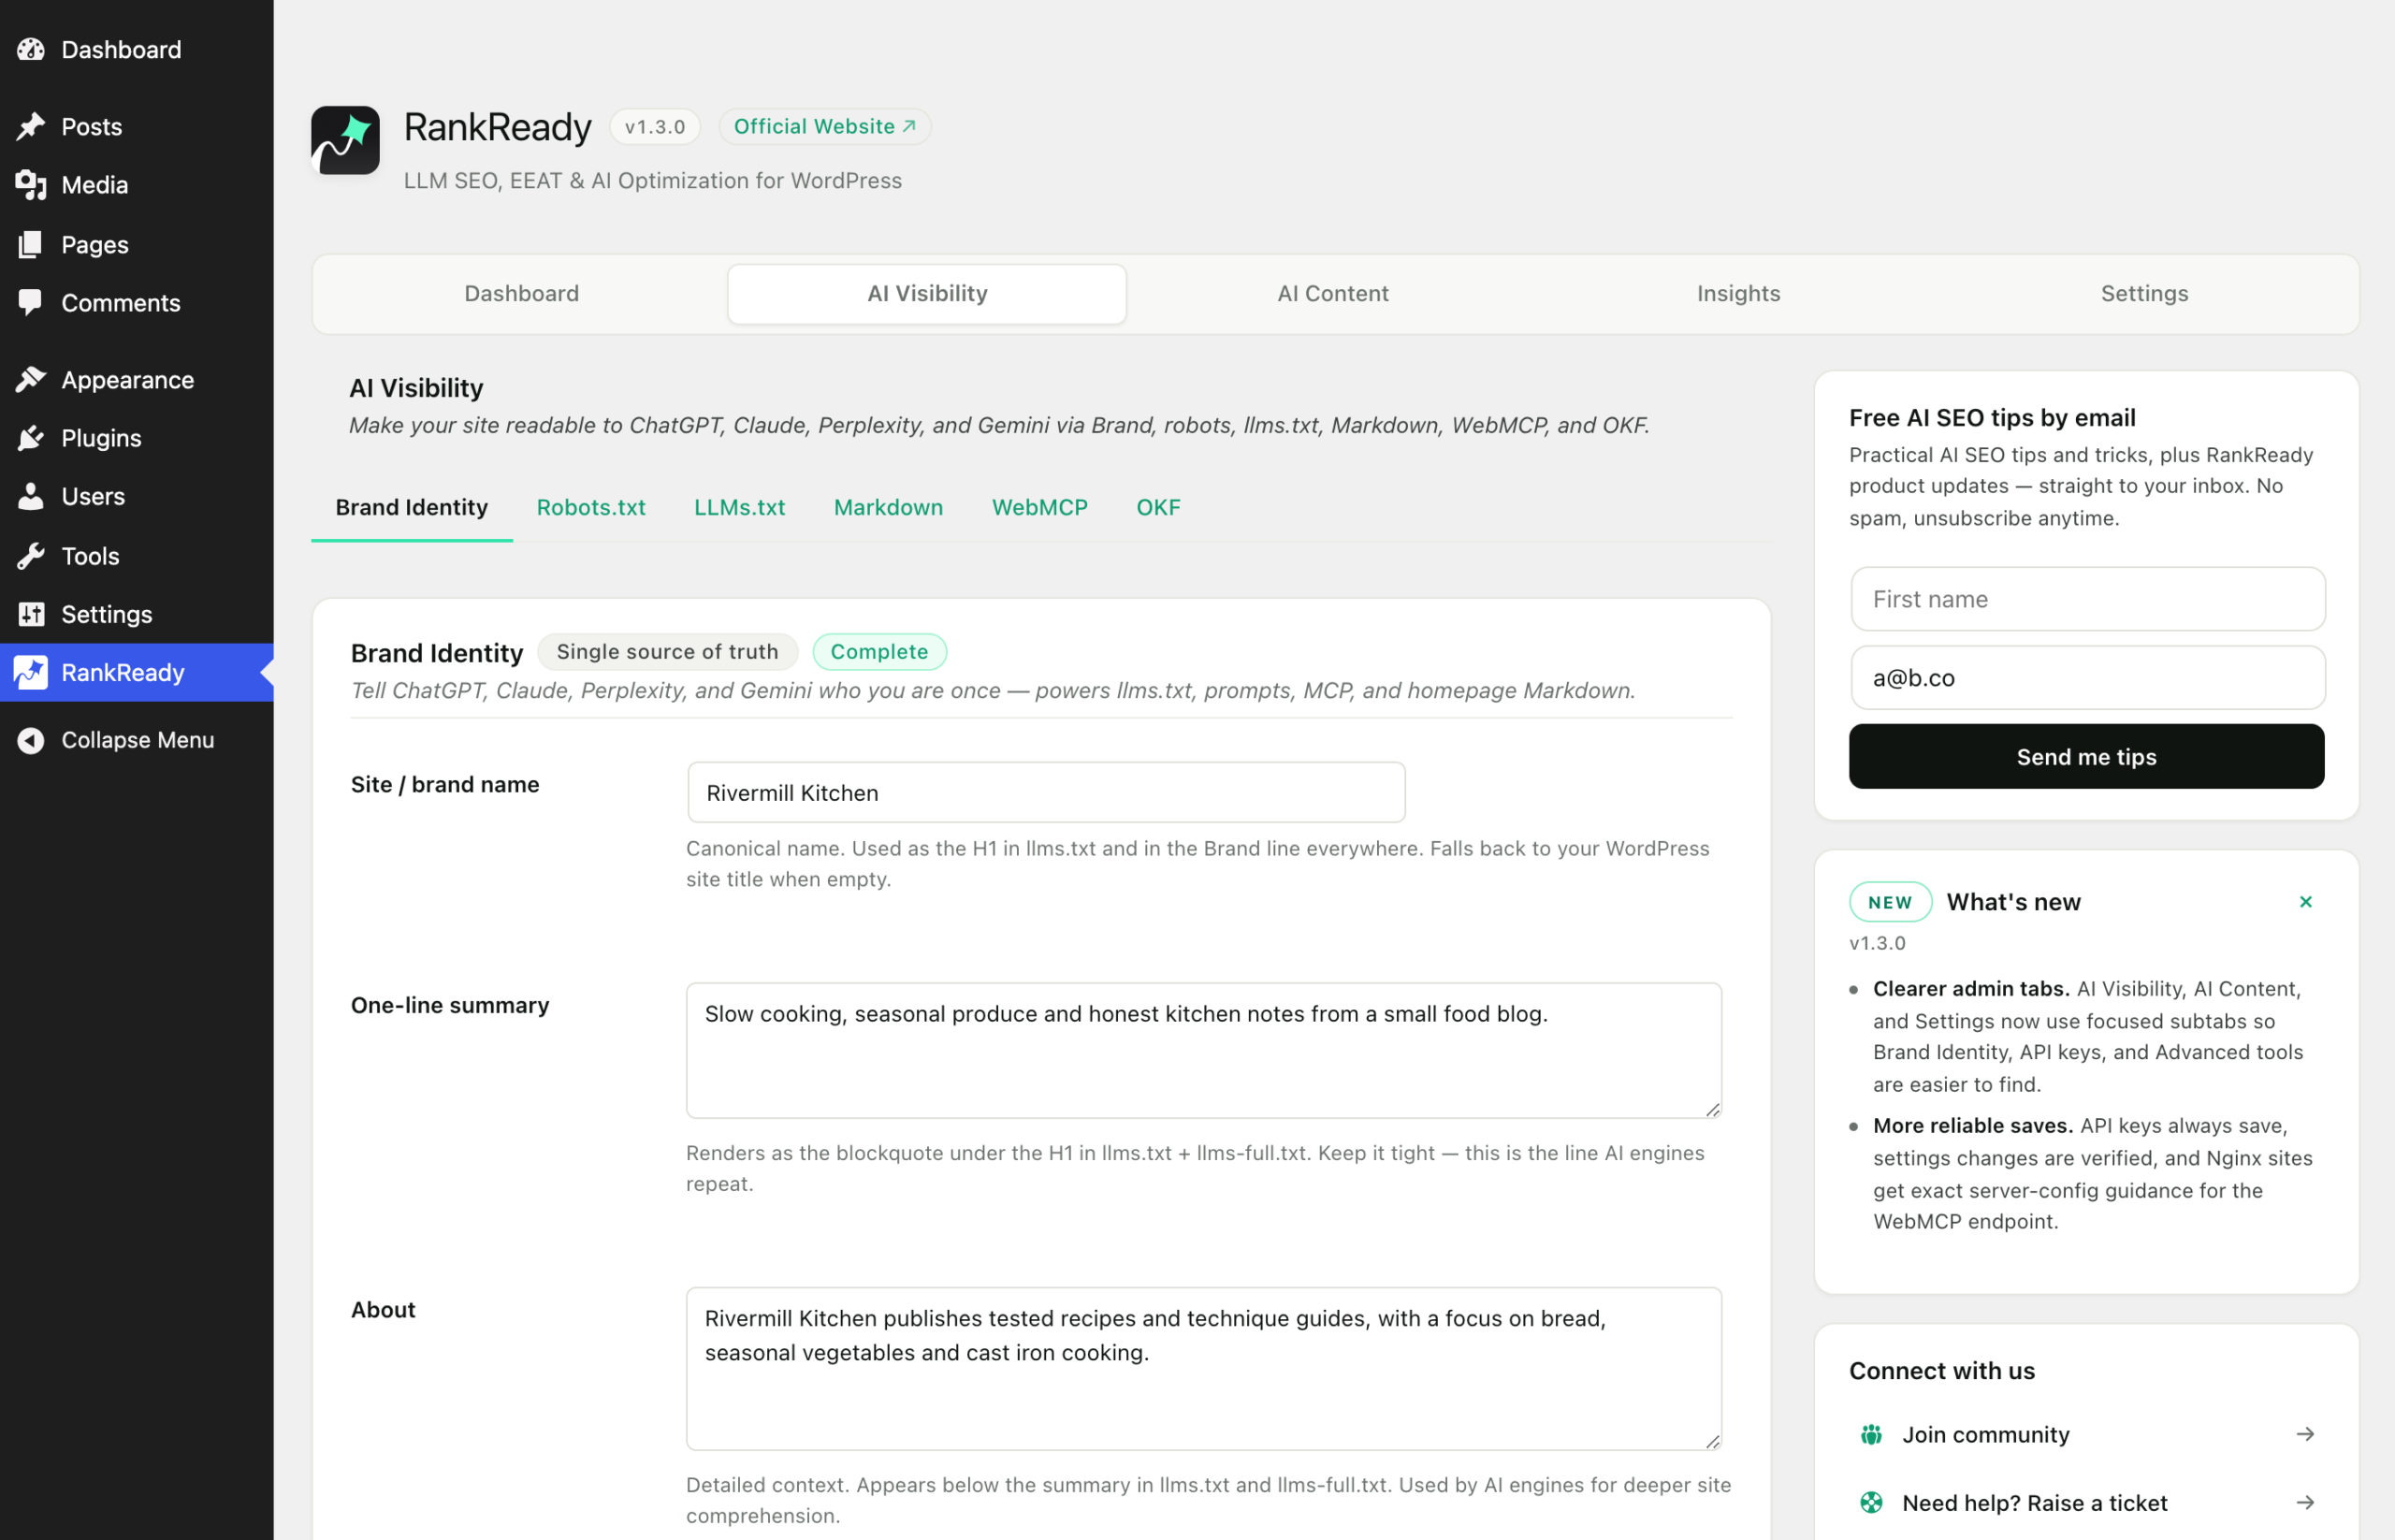
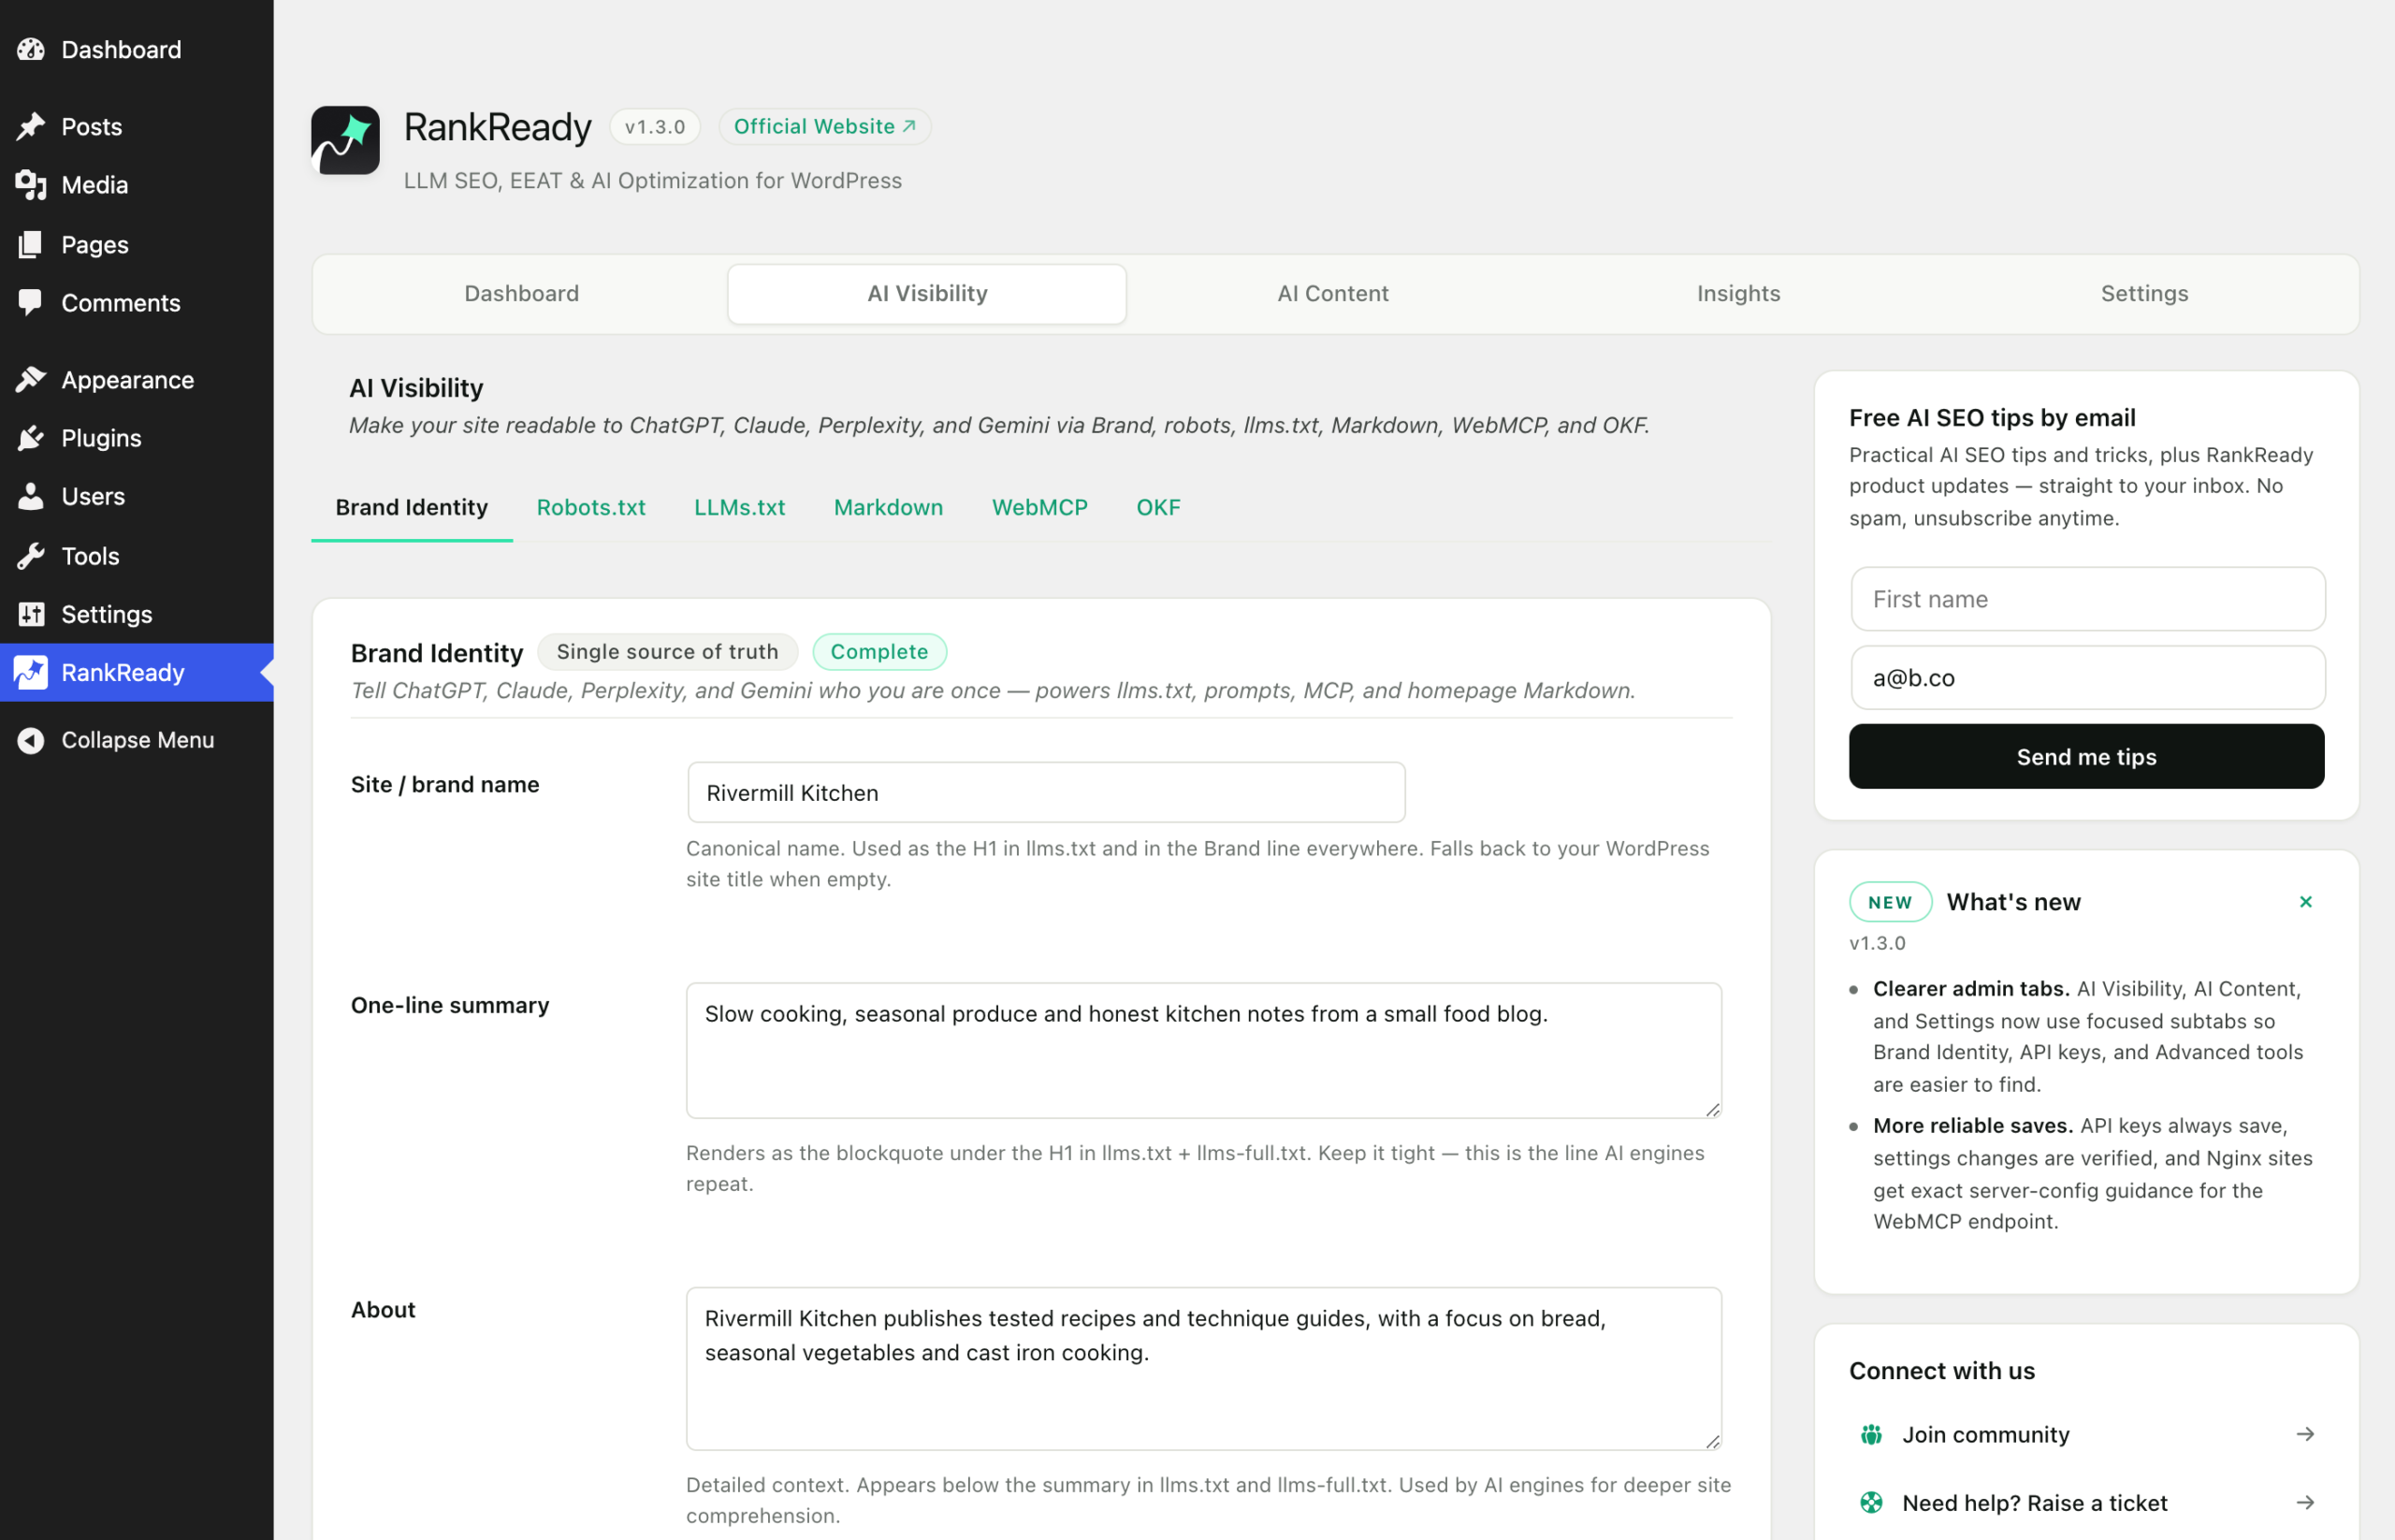
Go to AI Visibility, Brand Identity (sub=brand). This is the single place you describe the site: what it is called, what it is about, and the terms you want associated with it. Several other outputs read from here, including /llms.txt, so fill it in before you generate anything else.
Write it plainly. A short factual description of what the site publishes is more useful to a machine reader than a slogan.
Step 2: AI crawler rules
Go to AI Visibility, robots (sub=robots). RankReady manages a block in your robots.txt between # BEGIN RankReady and # END RankReady. Anything outside those markers is left alone.
You get 29 named AI crawlers to allow or block individually. The list includes GPTBot, ChatGPT-User, OAI-SearchBot, ClaudeBot, Claude-Web, anthropic-ai, PerplexityBot, Google-Extended, GoogleOther, Applebot-Extended, Bingbot, Meta-ExternalAgent, FacebookBot, MistralAI-User, Bytespider, Amazonbot, cohere-ai, DuckAssistBot, YouBot, PhindBot, CCBot, AI2Bot, Diffbot and PetalBot.
You can also set Content Signals directives: ai-train, search and ai-input. These state your preference about how fetched content may be used.
One detail worth understanding: Googlebot and Facebook’s link crawler get their own mirrored group that repeats whatever your existing User-agent: * rules already say. They are named so scanners can see them explicitly. Their permissions do not change.
Step 3: llms.txt
Go to AI Visibility, llms (sub=llms). Turning this on serves /llms.txt. The full-corpus file is a separate opt-in. Together they are:
/llms.txt, an AI-readable index of the site./llms-full.txt, the full corpus in one file.
/llms.txt supports ETag and returns 304 on If-None-Match, so a client that has already fetched it does not download it again unchanged.
Step 4: Markdown endpoints
Go to AI Visibility, markdown (sub=markdown). This serves any post as clean Markdown with YAML frontmatter at /{post-slug}.md, and the homepage at /index.md.
Two behaviours to know. Distinct .md URLs always serve Markdown no matter what Accept header is sent. That is deliberate, because it keeps them safe to cache.
Content negotiation on the canonical URL is a separate option on this screen. New installs have it off. When it is on, Accept: text/markdown gets Markdown, text/html gets HTML, and an unsupported type returns 406. Sites upgraded from earlier versions keep it on.
Step 5: WebMCP manifest
Go to AI Visibility, webmcp (sub=webmcp). This publishes a manifest at /.well-known/mcp.json.
On nginx this path returns 403 by default, because /.well-known/ is a dotfile path and nginx blocks those before PHP runs. That is a server configuration issue, not a plugin setting, and no plugin can override it. Ask your host to add a location ^~ /.well-known/ block that allows the path.
Step 6: Open Knowledge Format
Go to AI Visibility, okf (sub=okf). This serves an Open Knowledge Format bundle at /okf/. Like /llms.txt, it supports ETag and returns 304 on If-None-Match.
Step 7: AI Content
Go to AI Content (tab=content). Four subtabs: sub=summary for AI Summaries, sub=faq for the FAQ Generator, sub=author for the author box and sub=schema for schema.
Summaries and FAQs are the only features that need an AI API key. Everything in steps 1 to 6 works with no key at all. If you have not added a key yet, set the options here anyway and come back to generate later.
Step 8: Settings
Go to Settings (tab=settings) to choose your AI provider and paste a key. Supported providers are OpenAI, Anthropic Claude, Google Gemini and DeepSeek. You bring your own key. It is stored in your own site’s wp_options table, encrypted at rest. Generation is unlimited with no monthly cap, so what you pay is your own provider usage.
After you change a toggle
Turning an endpoint on or off changes rewrite rules. RankReady clears stale rules when you turn a feature off, so you should no longer see a raw 404 left behind. If an endpoint still misbehaves, go to Settings, Permalinks and click Save Changes once.
Then check your work
Load /llms.txt, /robots.txt and one /{post-slug}.md URL in a browser. If those three respond, the core of the setup is live.