
How to deploy your WordPress site to Cloudflare Workers with Astro
Deploy a headless Astro frontend for WordPress to Cloudflare Workers from the Hatch dashboard: choose an address, review the changes, and press Deploy.
Last updated October 28, 2026
By the end of this page your WordPress content will be served from a Worker in your own Cloudflare account. You need a Cloudflare token first. See Create the Cloudflare API token Hatch needs.
Before you deploy
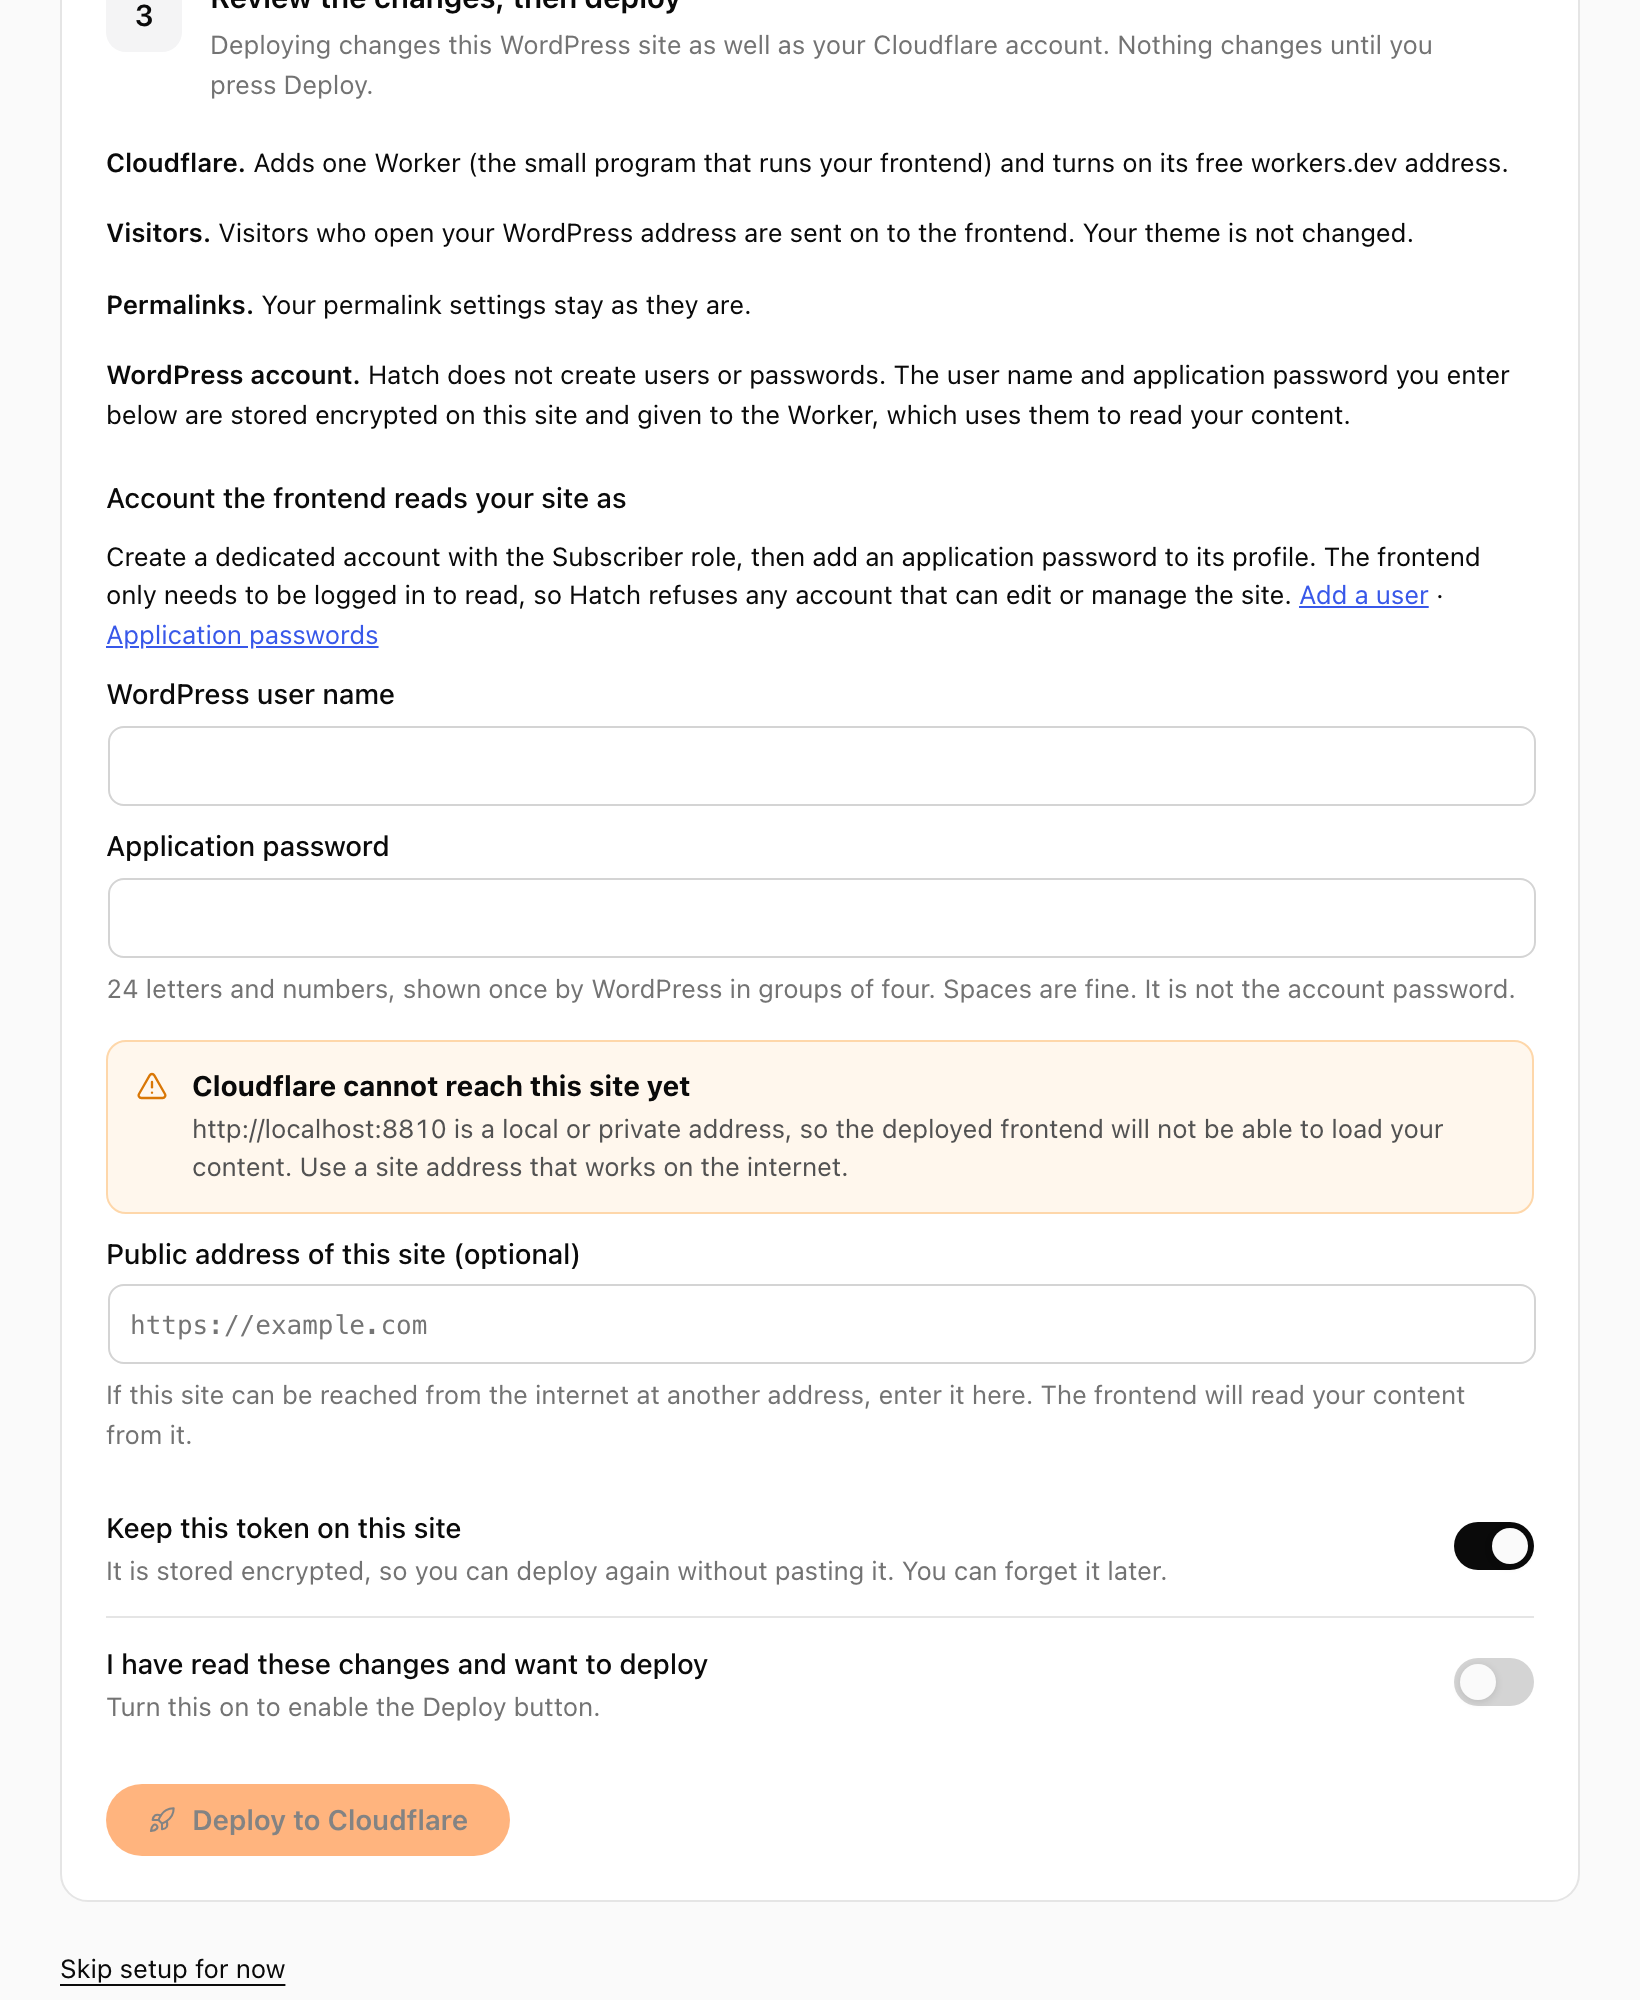
- Your site must be reachable from the internet over https. On
localhostHatch warns that Cloudflare cannot reach the site, and the deployed frontend would not be able to load your content. - Create a WordPress user with the Subscriber role, then add an Application Password to that user’s profile. The frontend only needs to read, so Hatch refuses any account that can edit other people’s posts or manage users, plugins or the site.
Step 1: connect Cloudflare
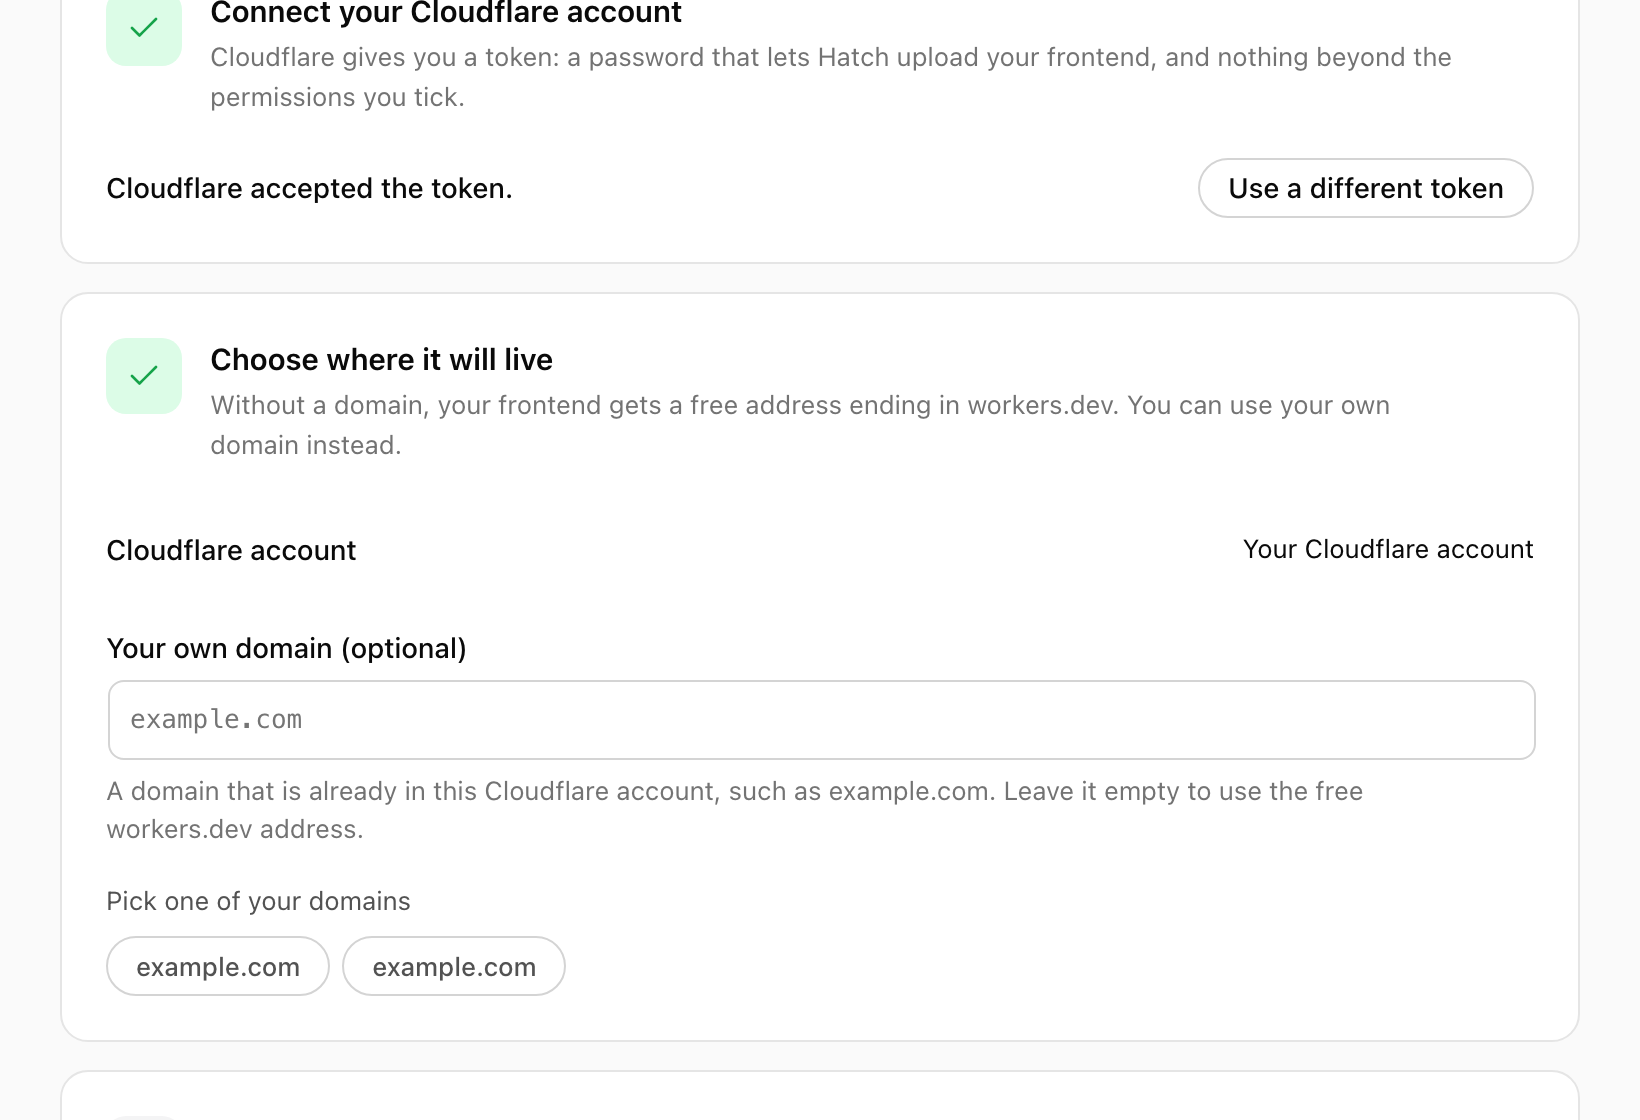
Paste your token and choose Check token. See the previous guide if Cloudflare rejects it.
Step 2: choose where it will live
Without a domain, your frontend gets a free address ending in workers.dev. To use your own domain, type one that is already in the Cloudflare account or pick it from the list. A custom domain needs the two optional Zone permissions.
Step 3: review the changes, then deploy
The review step lists what will change:
- Cloudflare. One Worker is added and its free workers.dev address is turned on.
- Visitors. People who open your WordPress address are sent on to the frontend. Your theme is not changed. WordPress screens such as wp-admin, wp-login, the REST API, feeds, sitemaps and previews are never redirected.
- Permalinks. If you use plain permalinks, the guide offers to switch to
/%postname%/and only does so if you tick the box. - WordPress account. You enter the Subscriber user name and Application Password. They are stored encrypted on your site and given to the Worker as encrypted secrets.
Enter the account details, tick I have read these changes and want to deploy, then press Deploy to Cloudflare.
After the deploy
Hatch shows the live address. Open the Connection tab to see the deployment status. Publishing or updating content refreshes the frontend automatically.
Undo it
Open Hatch, then Connection, then Disconnect. The redirect stops and Hatch forgets the stored token and account password. Revoke the Application Password in your profile afterwards. The Worker stays in your Cloudflare account until you delete it there.
What to do next
Check Hatch is working. If something fails, see the deploy troubleshooting guide.